As some readers of this blog may know, I'm currently working on a research project examining livestock guardian dog behavior. The back story is this: several years ago, I was invited to demonstrate electro-net and livestock guardian dogs at a workshop on livestock protection tools. The electro-net fencing was easy! However, since I was speaking at midday, the LGD demo was less than dynamic - the dog came over to the fence, barked half-heartedly at the people he didn't recognize, and resumed napping in the shade!
This experience got me thinking! How could I demonstrate the effectiveness of these dogs without dragging folks out to observe the sheep in the middle of the night (when the dogs are much more active)? Geographic positioning system (GPS) technology seemed like a possible answer - but commercial GPS collars were too expensive for my cooperative extension / sheepherder budget. While perusing Facebook one day, I ran across a post from Dr. Derrick Bailey at New Mexico State University. Dr. Bailey was using home-built GPS collars to track cattle distribution on New Mexico rangeland! At last, an affordable solution! Dr. Bailey was gracious enough to spend an hour on the phone with me talking about my project ideas - and he shared the technical details of the collars he was using.
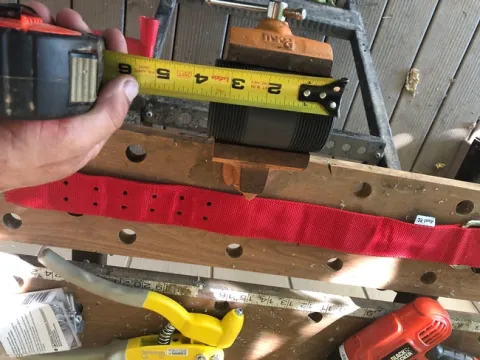
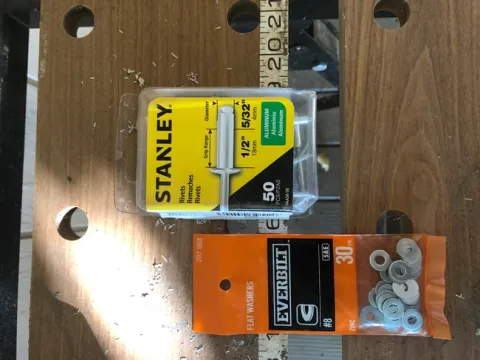
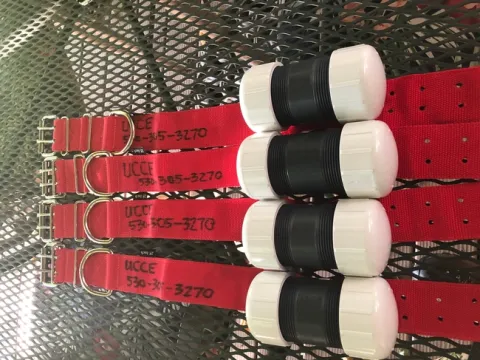
Here's a quick photo guide to building the collars I'm using on LGDs (and on sheep). The materials include:
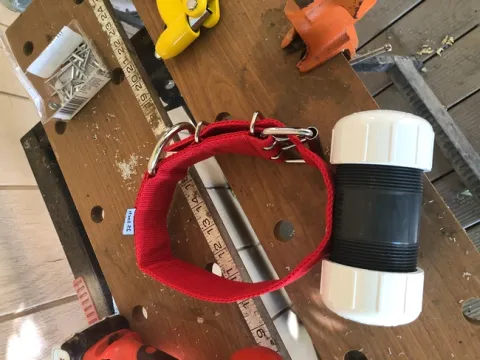
- LGD collars from Premier 1 Supplies (I like these extra-wide collars - I think they're comfortable for the dogs, and they seem to hold up in rangeland conditions). https://www.premier1supplies.com/p/guard-dog-collars?cat_id=164
- 3-1/2" x 2" threaded nipples and threaded caps (for the case)
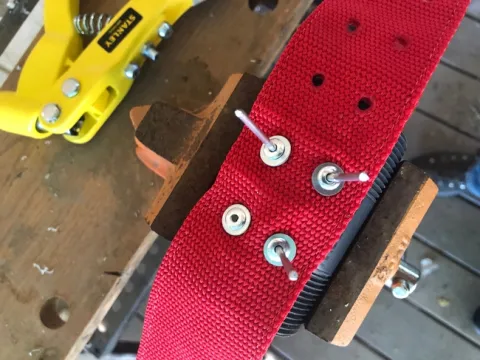
- 1/2" x 5/32" pop rivets and #8 SAE flat washers (to attach the case to the collar)
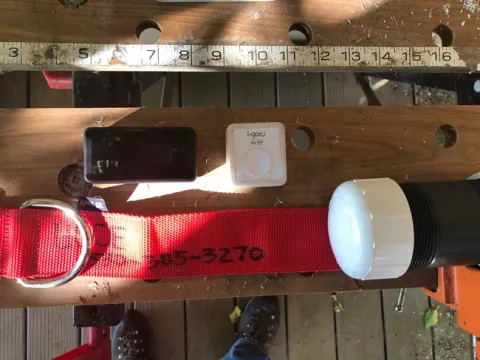
- i-gotU GT-600 travel and sports logger (available on Amazon - https://www.amazon.com/i-gotU-USB-Travel-Sports-Logger/dp/B0035VESMC/ref=sr_1_2?crid=2OO21VMYVPBN2&keywords=i+got+u+tracker&qid=1564451973&s=gateway&sprefix=I+got+U%2Caps%2C194&sr=8-2
The collars take about 5 minutes to build. The i-gotU trackers can be programmed to collect GPS coordinates from every 5 seconds up to every 5 minutes. Set at 5 minute intervals, the batteries in the unit will last 10 days. Dr. Bailey also sent me plans for an auxiliary battery system - that will be my next project!
I've also experimented with an Optimus 2.0 tracker (https://www.amazon.com/Optimus-Tracker-6543857646-GPS-2-0/dp/B01C31X50K/ref=sr_1_4?crid=UR8F2VQBBT8M&keywords=optimus+tracker&qid=1564452200&s=gateway&sprefix=optimus+t%2Caps%2C199&sr=8-4) which sends a real-time signal to my cell phone with the position and speed of travel of the unit. These trackers don't record positions, but they are useful from a practical standpoint - they will send an alarm to my phone if a guard dog is out of my pasture.
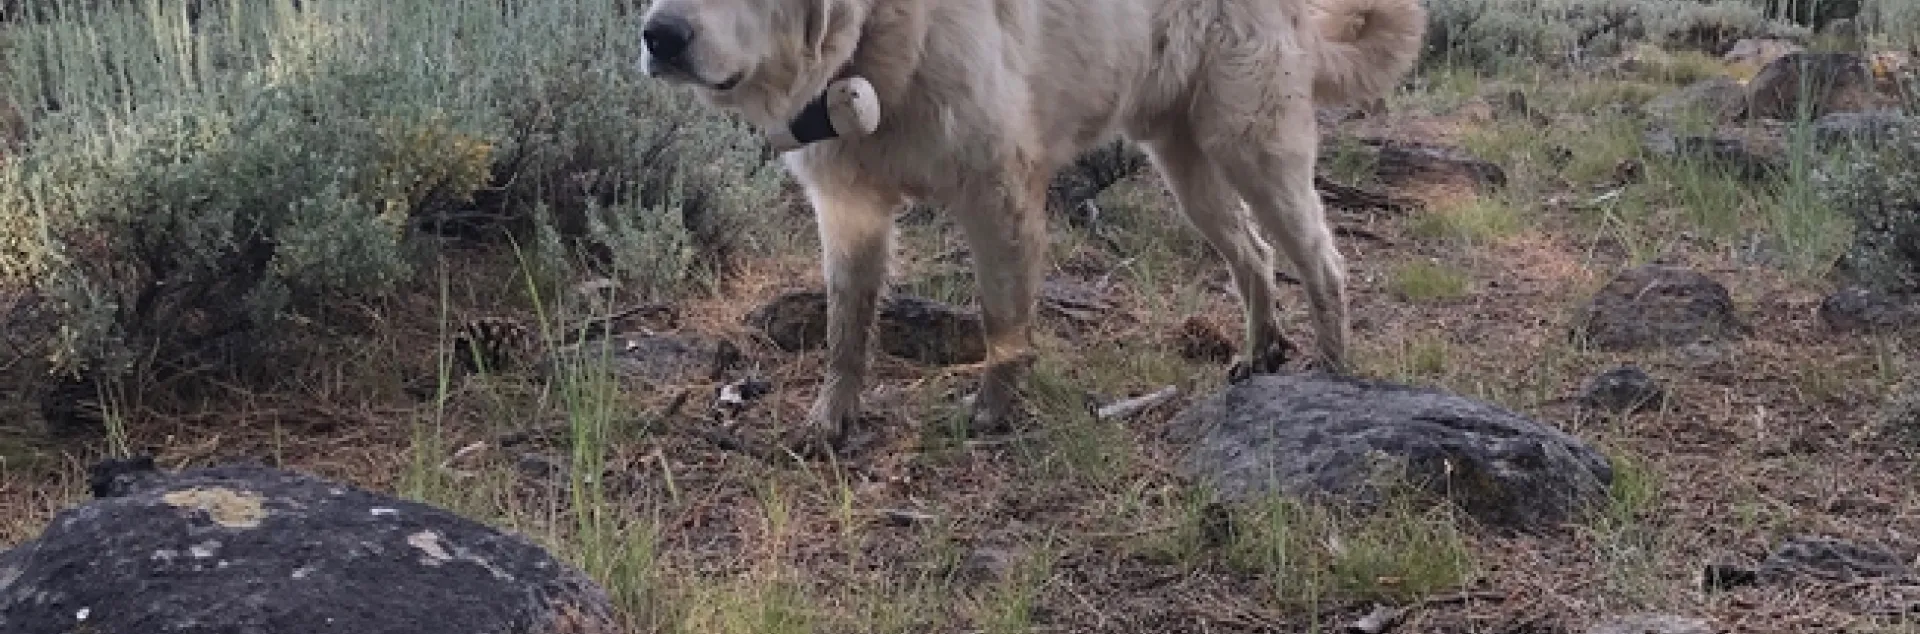
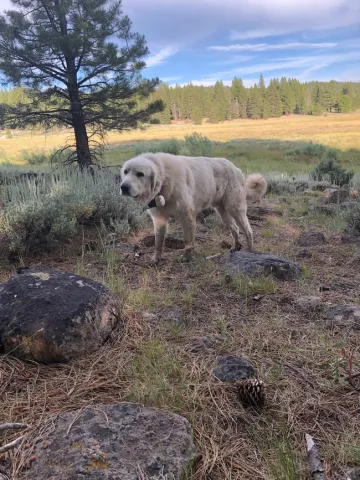
I'm hoping that we'll have some data to share from my project on the Tahoe National Forest north of Truckee in the next couple of weeks. Working with Talbott Sheep Company, I've collared 2 dogs in each of 2 bands of sheep. So far, the collars seem to be working great!
And on a humorous note, as you can see from the photos, I put UCCE (for University of California Cooperative Extension), along with my phone number, on the collars. I received a text yesterday that said:
"Hello, we found Ucce at the upper little truckee campground this morning. He still has his tracker around his neck and is just hanging out at the campsites."
I explained that we were doing a research project with the dogs and that someone would come by to get the dog soon.
That said, I think Ewecie (or maybe Ewechie) would be a great name for a guard dog, don't you!?
Here are some photos to walk you through building a collar.