Prepping Soil for Raised Vegetable Beds
We often hear from Contra Costa gardeners this time of year who are eagerly anticipating their summer vegetable gardens. One of their most frequent questions is how to make sure their soil is up to the task. Whether a garden bed is new or has seen years of service, starting with soil preparation is critical to growing vegetables successfully. Start by addressing any nutrient deficiencies with soil amendments and compost to ensure your soil is suitable for growing vegetables. After you have cleared your planting site of any weeds and prepared your soil, it's time to start growing!
Getting Started: New Raised Beds
A newly added raised bed can be filled with any good planting mix or modified soil. One-third to one-half of the mix can be your native soil, and the remainder may be compost or other organic material. If you have good quality loam topsoil available, less organic matter is needed. If you choose to purchase soil, ask your nursery or landscape material center for a soil mix specifically for growing vegetables in raised beds.
Getting Started: Existing Beds
Much of Contra Costa County has clay soil, which is heavy but fertile and retains water well. When clay soil has the right moisture level, it will easily break apart into a granular structure perfect for growing vegetables. As the rainy season winds down, now is a good time to start getting the soil ready for the growing season because clay soil should be worked when it is moist but not soggy.
If your existing garden beds have been sitting empty since last summer's harvest, the lack of growing plants may have also depleted the microorganisms that are present in healthy soils. These microorganisms help break down organic matter in the soil into nutrients plants can use. In turn they receive some of the sugars plants produce through photosynthesis. We recommend you always try to keep something growing in your beds. If you don’t grow winter vegetables, plant some cover crops to provide the microorganisms with a food source.
Next: Adding Nutrients
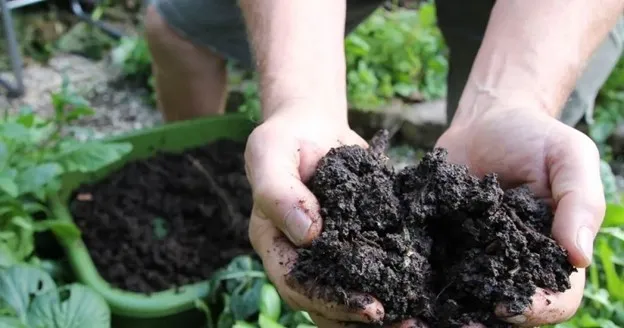
Adding compost and other organic matter to the soil mix in your new or existing beds should help replenish the microorganisms and add missing nutrients. When you are digging a vegetable bed for the first time, spread 2 to 4 inches of compost over the prepared garden area.
If you haven’t been adding compost, manure or fertilizers to your existing beds on a regular basis, their nutrient levels may be more depleted than in a soil mix you used for new beds. If this is the case, consider adding more compost to your existing beds than you add to the new beds—maybe 3 to 4 inches of compost for the older beds. Compost breaks down in the soil over time, so plan to add compost to your beds each year when you prepare them for planting.
Till or No Till
There is some debate among gardeners about whether composts and manures should be tilled into the soils or just placed on top of existing soils. Roto-tilling can quickly break down the soil structure more than is desirable, so when possible, hand-tilling is recommended.
When you are filling new beds and replenishing older beds, mix the compost/manure into the top 5–6 inches of the underlying soil mix using a garden fork. Your goal is to loosen the soil about 6 to 10 inches deep, about the depth of a spade or the digging fork.
After the soil has been loosened, rake the surface smooth and break up any large clods that remain. If you are preparing a bed for the first time, you may need to rake and break up clods several times to achieve the uniform soil structure you want for your vegetables. If the clods are hard and dry, wet them and then start working them down.
If you have planted cover crops, the recommendation is to harvest and cut up the cover crop biomass and use it as a mulch (leaving roots in the soil), then cover the biomass with a layer of compost without tilling it in. With this strategy, you simply plant directly into the layer of compost. The advantage of this “no-till” approach is that you are not disrupting the microbial life that you were trying to maintain with the cover crop.
Soil Testing
Once your beds have been prepared for planting, you might consider having the soils tested to determine whether the pH level is good for growing vegetables and whether any important nutrients are missing. A commercial soil test is the most accurate check and will report on levels of the three essential nutrients—nitrogen (N), phosphorous (P) and potassium (K) as well as on important micronutrients. Alternatively, you can test the soils for pH and NPK using a soil test kit available online or at most nurseries. Check the expiration date and be sure you carefully read and follow the instructions for using the test.
See our web page on Sustainable Gardening to learn more about maintaining healthy soil: https://ucanr.edu/site/uc-master-gardener-program-contra-costa-county/sustainable-gardening
Help Desk of the UC Master Gardeners of Contra Costa County (RDH)