Saving Seeds

Seeds can be expensive, and some varieties are hard to find, but there are other benefits to seed saving. If you choose to, you will be continuing an ancient agricultural tradition, promoting self-sufficiency, and helping to preserve genetic diversity. Also, since you will save seeds from your healthiest plants, you will be replanting varieties that thrive in your area rather than those which are adapted to a different climate.
The easiest seeds to replant come from open-pollinated plant varieties. The seeds from these naturally pollinated plants will grow true to type—meaning that they will be like their parent plant—unlike the seeds from hybrid plants. Those that are also self-pollinating are the easiest to start with. They include:
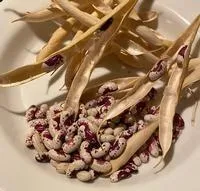
* beans
* eggplant
* lettuce
* peas
* peppers
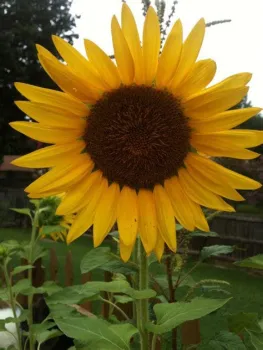
* sunflowers
* tomatillos
* tomatoes
Plants that easily cross pollinate between two varieties within the same species—broccoli, Brussels sprouts, cabbage, cauliflower, cucumber, kale, melon, pumpkin, radish, summer squash, turnip, and winter squash—will be harder to save seeds from because cross-pollination from other varieties can create seeds with unknown characteristics. Even if you are not growing multiple varieties in your own garden, they can be pollinated from other gardens nearby. Saving true seeds from these plants will require preventing cross-pollination by isolating plants from each other or covering them with mesh bags.
Once you have determined which species to save seeds from:
Identify your healthiest plants with the best produce. Choose plants with the characteristics you want to replicate, such as the best tasting produce or the most productive in your garden conditions.
Let the seeds mature on the plant before collecting them, which can be up to a month beyond when you would normally harvest the produce. Keep in mind that leaving vegetables on the plant will slow production. For plants that produce flowers, such as lettuce or arugula, let them ‘bolt' and then collect the flowers or seed pods.
Clean and dry the seeds. This process depends on the type of seed.
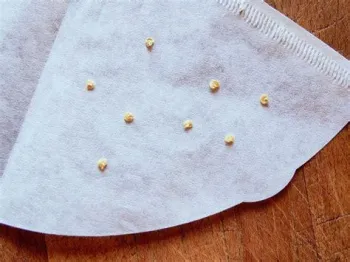
The seeds from wet fruited crops need to be scooped into a container and rinsed to remove the pulp. In the water, the heavier seeds will sink to the bottom—these are the ones to save. Spread them out on paper towels, paper plates, or coffee filters. Allow them to dry for a few days, testing to be sure the seeds are hard and completely dry before putting them into an airtight container.
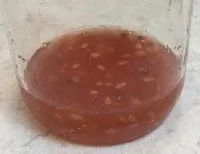
Tomatoes are a special case; they require a few days of fermentation to remove the gelatinous coating surrounding them. The pulp and seeds are squeezed from overripe tomatoes, placed in a covered glass container, and left on the countertop to ferment for 3 days. If a layer of mold develops on top of the liquid, it is not a problem. Again, the seeds that sink to the bottom are the ones to save. Rinse and dry as above.
Many flower seeds are easy to dry and save. The mature blossoms are harvested and stored in a paper bag for a few weeks to allow the seeds to dry completely before processing them.
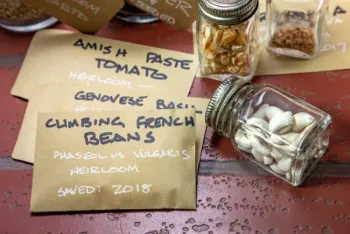
Label and date the seed packets. Include the plant species and variety, source, when harvested, and any steps taken to prevent cross-pollination. This will be especially helpful if your seeds are shared with others.
Starting plants from your own saved seeds or sharing seeds from your best plants with other gardeners is not only a rewarding way to grow your gardening knowledge and skill—it is an act of stewardship. Many heirloom varieties are with us today because home gardeners had the foresight to preserve their seeds.
Seed Savers Exchange
UC Master Gardeners of Contra Costa County: Seed Saving Webinar
UC Master Gardeners of Santa Clara County: Seed Saving Basics
UC Master Gardeners of Butte County: Save Seeds for Thriftiness and Self-Reliance in the Garden
UC Marin Master Gardeners: Saving Seeds: Select, Collect, Store, Sow.